
My daughters love arts and crafts and have been begging for more projects. I had already planned to pick a few arts and crafts projects for them to do, but when it became clear that they (and some friends) would enjoy a more organized art curriculum for this school year, I decided to get to work and start planning. The resources that exist are amazing and there are so many to choose from. I hope that sharing what we decided to use can inspire some young artists!
Many YouTubers who make art-related videos seem to overload them with flashing lights or startling sounds. My learners don’t respond well to that. Likewise, creators with wonderful information but monotonous narration lose the interest of my young students. One of my most exciting discoveries was WingedCanvas, a YouTube channel which declares “We’re an online art school dedicated to making creativity easily accessible to everyone because we believe art is essential to humanity. Our education channel is designed for art students, teachers, home schoolers, life-long learners, and other art nerds like us.” I mean, what’s not to love about that, right? The kids’ first assignment was to watch this video about the Element of Line.
This video, and the others in the series, were engaging and entertaining for all of us. Even my son, who is a reluctant art student, really enjoyed the style and seems to be looking forward to seeing more.
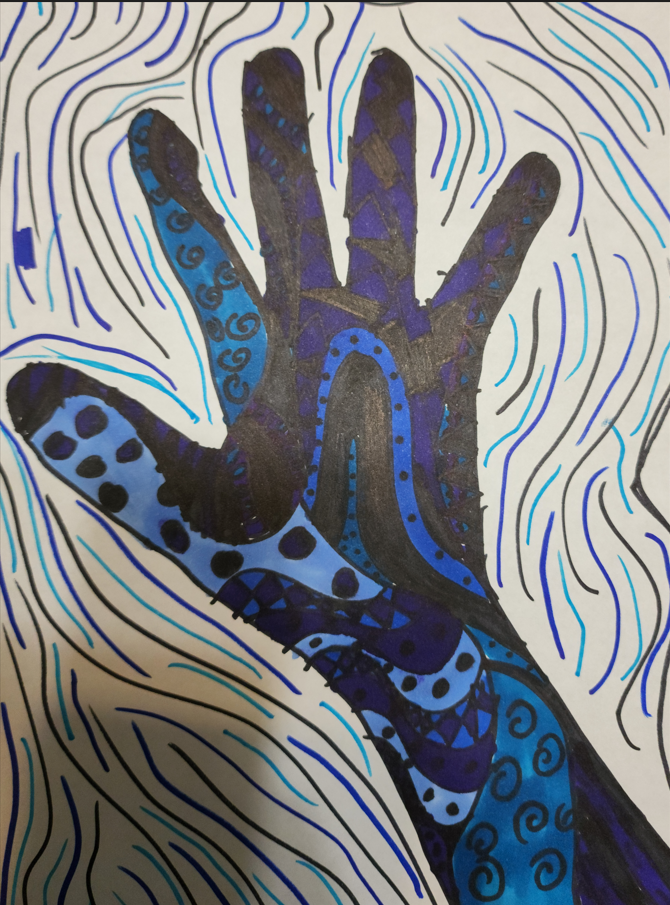
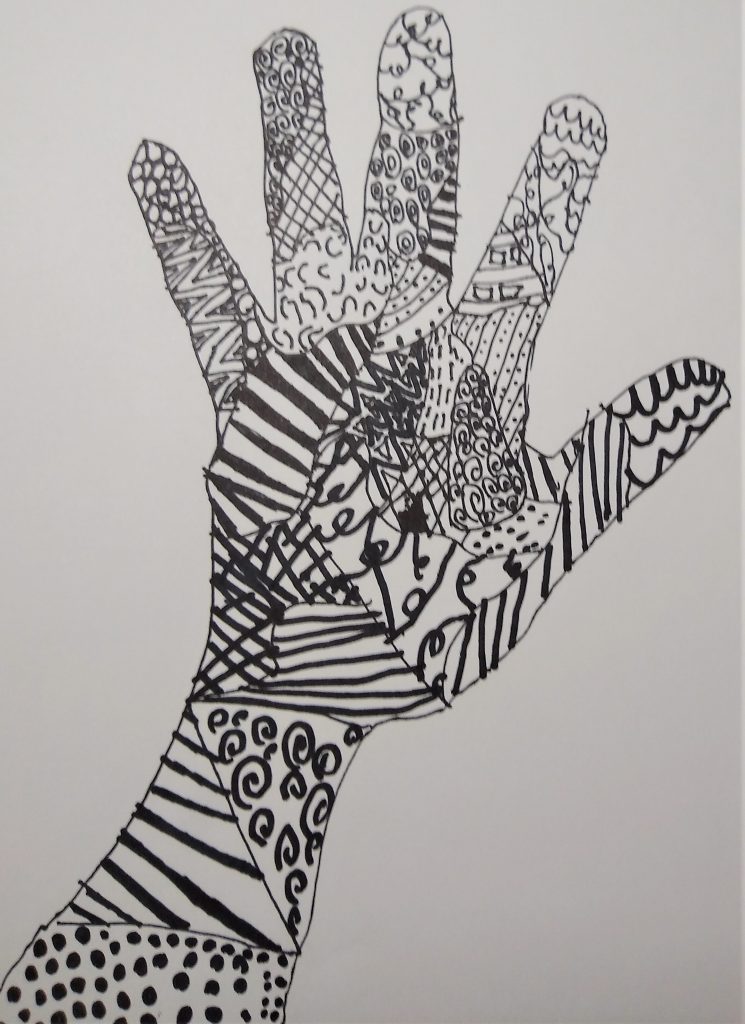
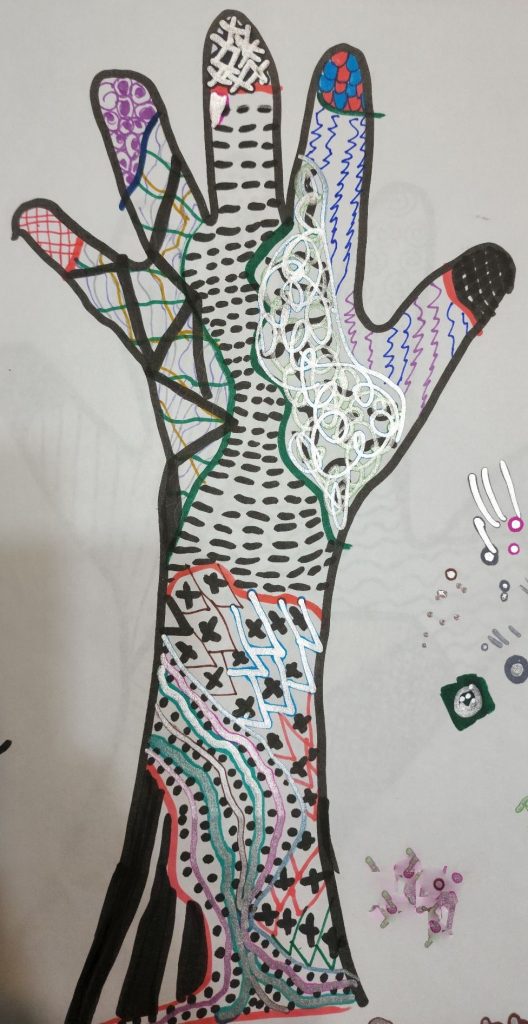
For each element, I decided to assign the kids independent projects that they could do on their own and then facilitate one larger project that we could do together, as a family or as a group. I gave each of the kids a wonderful FREE printable from Painted Paper Art on Teachers Pay Teachers. The first independent project that they did was The Hand Line Design from artlessonplanvideos. I told them that they had 5 days to complete it, as we need to practice independent time management and this one might take a while.
To my amazement, each of them submitted their assignment to me in the first day! Here are some of their pieces:
For my youngest daughter, I assigned a different line project. We did a project from Leafwood Learning Art Lessons, though we modified it a bit to meet our needs. The link to the printable circle page is available in the description of the video.
The printable has descriptions for each circle, intending for the child to draw particular types of lines. Instead, using the free line handout I mentioned above, I allowed my daughter to pick any types of lines she wanted and fill the circles with them. She loved being able to choose. Being the smarty pants that she is, when her hands got tired and she didn’t want to work any more, she got her vibrating silly pen and used it to make curly lines in her final circle. She was immensely proud of this workaround.
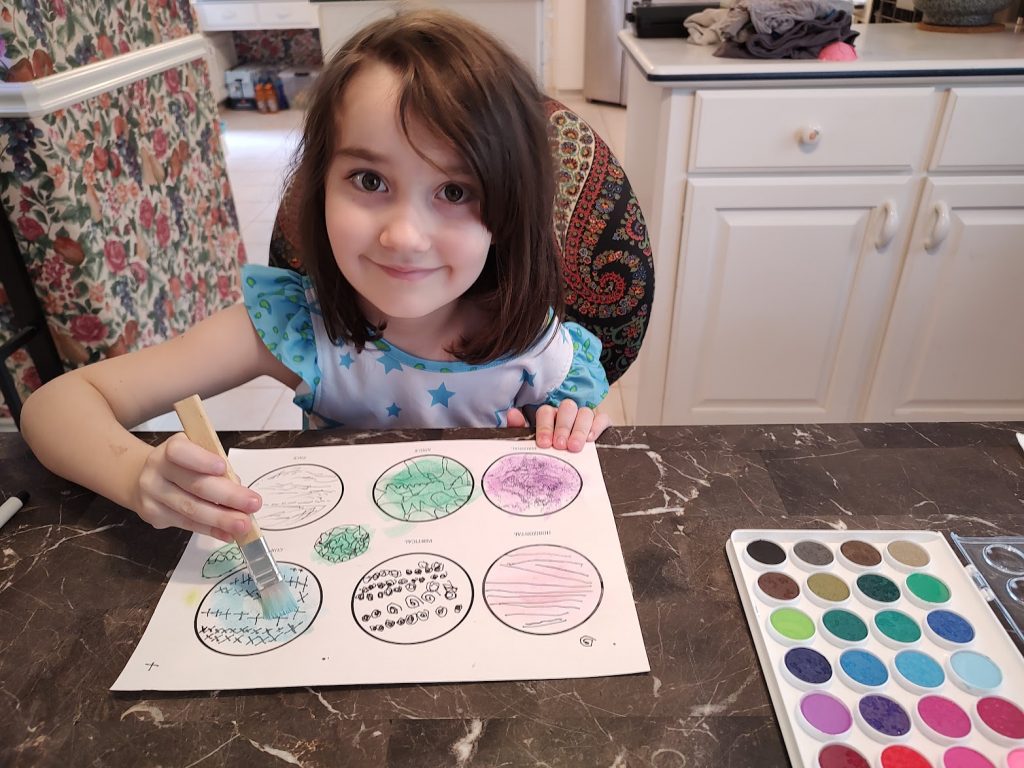
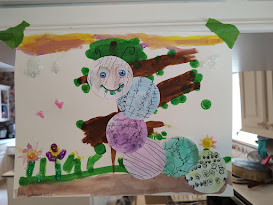
Once she had drawn her lines, she used watercolors to paint the circles. I gave her a choice between that and using her dot paint markers. With this, we were able to practice proper brush usage and respecting a “big kid” watercolor set. Next, I gave her a sheet of watercolor paper and let her decorate the background however she wanted. When she was finished, I cut out the circles for her and she added googly eyes and glitter glue, as well as drew the antennae.
I gave the kids a choice between two videos to watch, in order to learn more about the element of line and see more examples of its use in art. The first video, which seems to be the only one chosen so far, was this one, by ArtofCoe_Ed:
The alternative option was a longer video by Art Prof: Create and Critique. Both were informative and interesting.
Because the kids finished their hand drawings so quickly, I had to come up with another assignment to give them. The one I chose was the Amazing Freehand Line Drawing Illusion from Jon Harris. Here it is:
I haven’t gotten any submissions back yet, but I will update when I do! I thought this was very interesting because at first glance I would not have guessed that it was done in the method it was.
The big project I chose for our first gathering was not chosen because it was related to line, though I did get lucky in that area. I chose it because a great friend sent me a link to the video and I knew we HAD to do it. This project was based on Andrea Nelson’s tutorial for Pet Portraits. She has explanations in other videos on how to prepare “goth glue” and she is so fun to watch!
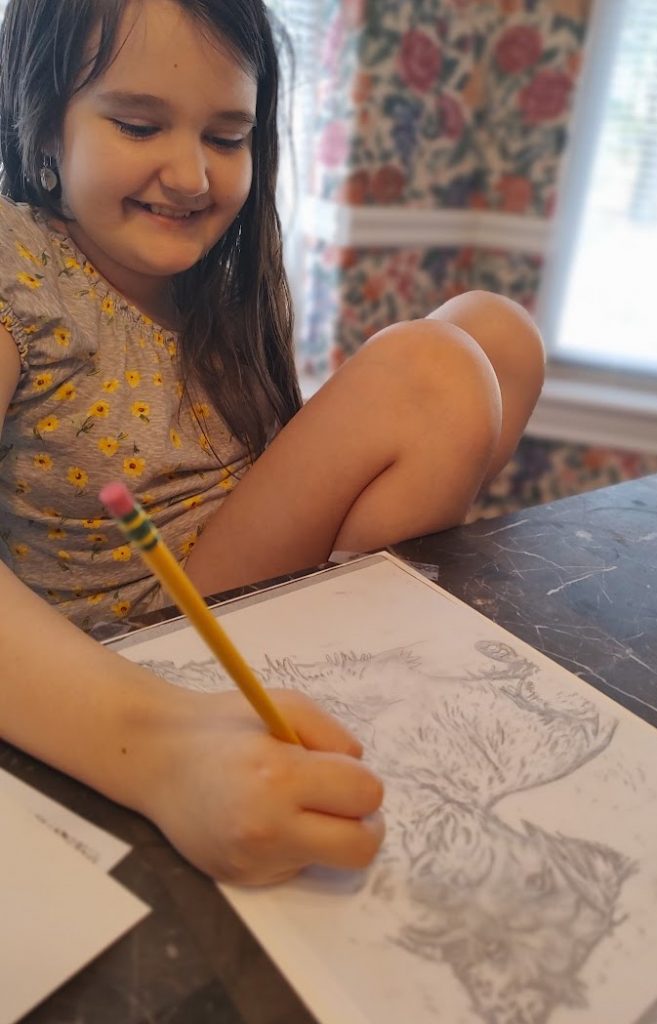
I won’t get into all of the instructions because you really should check out Andrea’s videos, but I will share what we changed. I used a photo editor to simplify photos of our dogs, mostly to save printer ink. I layered tracing paper over the photo, which we put on top of graphite paper over watercolor paper. We taped the stacks to the table for stability and went to town.

Once traced and “goth glued,” we let them sit for a few days to make sure they were completely dry.
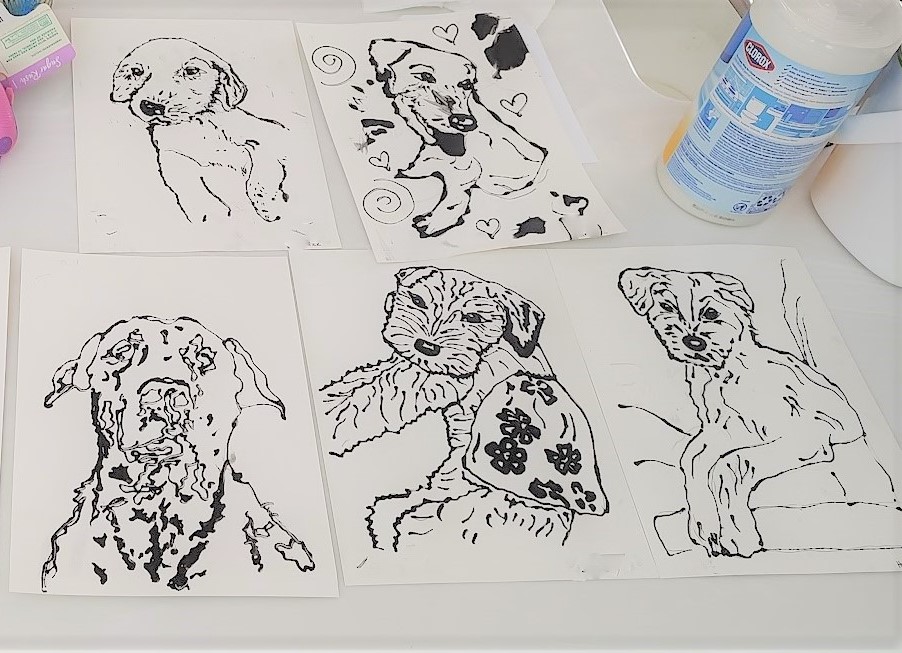
We met up a few days later and everyone painted their pups with watercolors.
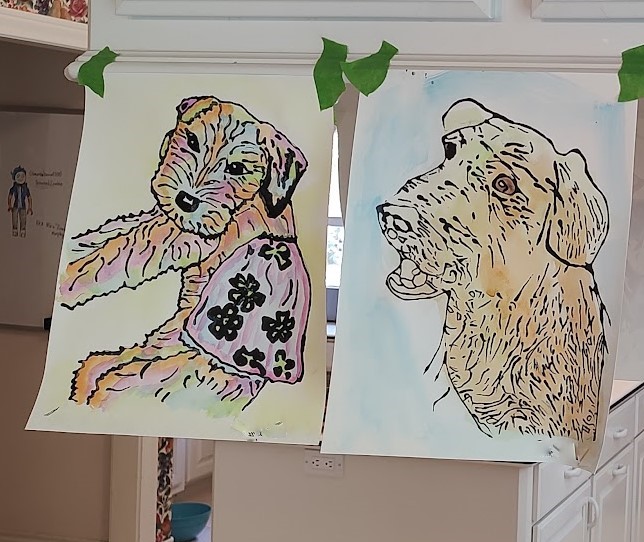
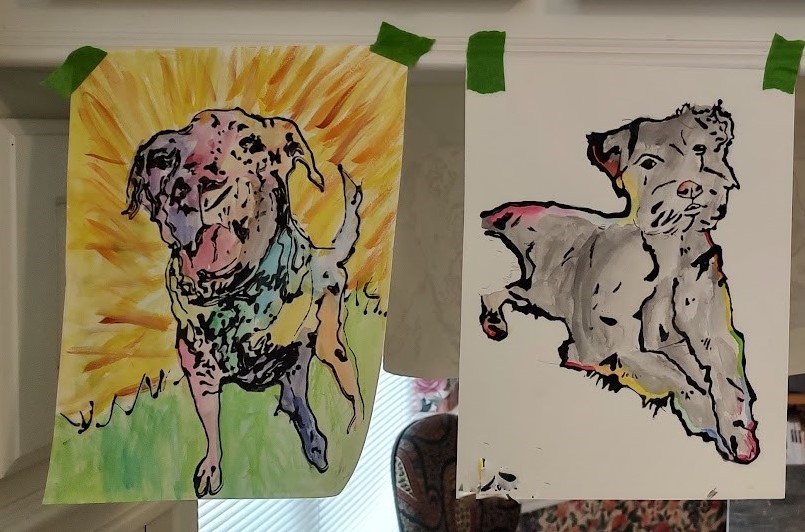
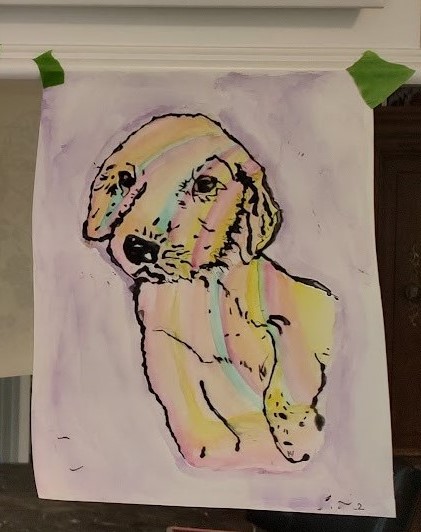
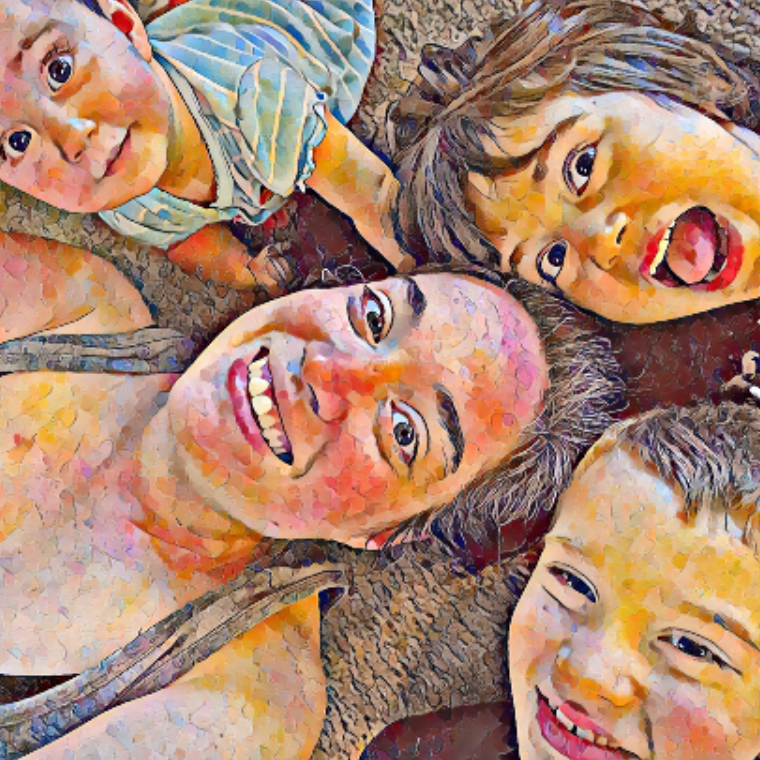
These were some of the final results. I am thrilled with the outcome!
I’ve still got to come up with assignments for next week, but so far, I think Art Class has been a success!