
Home School Dual Credit with LoneStar College
Homeschooling has been a wonderful choice for my family and for many others. In Texas, homeschoolers have to be taught reading, spelling, grammar, math and good citizenship (civics/government). There is no required registration, curriculum approval, mandated testing or submission of records. I’ve been homeschooling my three kiddos (ages 16, 14 & 9) since the beginning. The relaxed requirements in Texas meant that I could choose the curriculum and resources for my kids, and change them as often as I needed to. Every child learns differently and I loved that I could change gears easily for them. Knowing where they stood compared to public school expectations was a concern, as was the eventual high school experience. Another concern was whether their college opportunities would be effected. Thankfully, Lone Star College is a fantastic option and homeschooling isn’t getting in the way of their education.
Below are the steps we took to pursue High School Dual Credit at Lone Star College. The college has information available, but we found some of it to be confusing or unclear. I hope that this helps other families who might have also felt that way.
Step 1: Dual Credit Information Session
The first thing to do is to attend a Homeschool Dual Credit Information Session at the college. The college has a Homeschool Dual Credit page that says to contact an adviser at your respective campus. We attended a session and found it very informative. It was a wonderful opportunity to speak directly with the advisors and staff as well as to meet other dual credit students / families and even tour the campus with a student guide. If your campus is Montgomery, here is a link to upcoming information sessions.
Step 2: The Partnership Agreement Form
If you reached out to your campus for more information, you should have been given a link to the Partnership Agreement Form. This form is required before submitting the other paperwork for registration. For Montgomery, Conroe and Creekside locations, this is the link.
Step 3: Apply Texas
After attending an information session, your student needs to Create an Account on Apply Texas. This step was very confusing for us.
The information that we had from a power-point at our session told us what to choose as home campus and high school. Homeschool Texas was not on the list of options for high school. I believe we ended up selecting Home School tx – null. The college to select in the search was Lone Star College System.
GRADUATION DATE NOTE: The graduation date that you choose for your student is when the discount for dual credit tuition will stop. If you are thinking your student may graduate early, you may still want to choose the 4 year date. It can NOT be changed after they are registered!
For Major, select either an Associates of Science or An Associates of Art. Choosing dual credit will not pull up options for applying.
At this point, you can choose the campus of your choice. The campus is really the one where you will go in person to deal with your advisor. It is NOT where you are required to take classes. Students can take classes at any Lone Star campus. Choose the one that is most convenient for required paperwork.
After submitting, we received an email instructing us to finish any last steps required by Lone Star. They mention an application fee, transcripts and test scores. Wait for actual communication from Lone Star. Don’t Panic!
Don’t continue until you receive a Lone Star student ID. It should arrive by email. It took about 5 days for ours to arrive.

Some Great Communication
We reached out to our dual credit office by email because we were stumped with Apply Texas. Their default response was very thorough. Here is the information that they shared:
- Course Approval AND Parental Consent and Waiver for Dual Credit / Exceptional Admission Students Age 17 or Younger
- Dual Credit Office is closed Friday – Sunday during the summer
- We are currently experiencing a very high volume of emails and there may be an extended delay in our response. We strive to respond within 48-72 business hours. We do not respond to emails over the weekend. Please be patient. We are responding as quickly as we can. We will address every email we receive in the order they are received.
- We are currently registering for Summer 26, Fall 26, and Spring 27.
- Payment Due Dates: Summer 26: May 15 Fall 26: August 1 Spring 27: January 9 *Payment is due by 5:00pm on the due date or you will automatically be dropped for non-payment.
- HOMESCHOOL STUDENTS** Homeschool Dual Credit Information Sessions for New Families: Book your session here
- First-time Students: If you need to book a new student meeting, please click here: Book your appointment here. (Attend Info session above first.)
- Returning Students: If you need to book an advising appointment, please click here: Book an Advising Session Here
- Ready to register? Upload all registration documents HERE
- For Easy Reference: The Required Registration Items are: Updated Homeschool Graduation Plan Updated Homeschool Transcript Completed Exceptional Admissions Course Approval Form (Submit separately for each term i.e. summer, fall, etc.) Upload all registration documents HERE Note: This can’t be completed until you receive the Lonestar Student ID.
Step 4: Homeschool Graduation Plan
This is NOT your student’s transcripts. This is simply the anticipated courses that your child will complete through their High School journey. In order to fill this out, you need to have a plan. Google docs is a great place to organize all of the information that you will need. For each of my kids, I started a docs page that had a tab for a High School Plan, Semester Plan, Degree Plan, and any other notes.
High School Plan
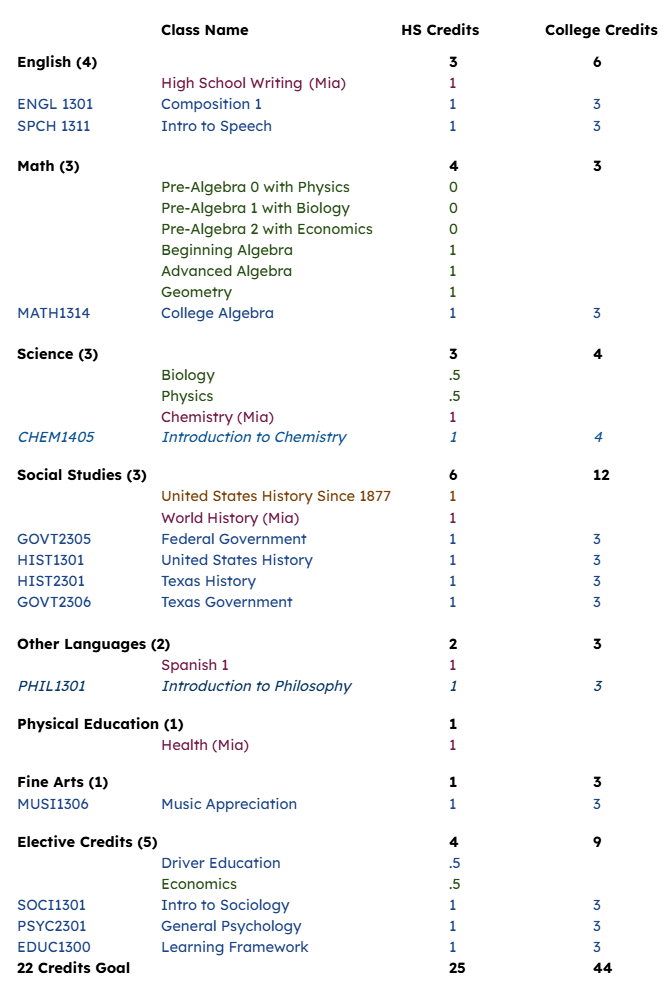
Even though homeschoolers don’t need to follow the state graduation requirements that public schools do, I used the credit requirements as a baseline to start Then, I started typing in the classes that I knew my child would be taking. My list is color coded because I wanted to know at glance which format/curriculum I was using based on color.
Credits were a funny thing to wrap my brain around. A full year high school level course is worth 1 high school credit. A semester high school level course is worth 1/2 credit. A semester college level course is worth 1 high school credit towards graduation AND they accrue college credits at the college depending on the class. After entering the courses that I knew we would handle on our own, it was time to fill in the gaps with college courses.
Lone Star College has a Core Curriculum page . One of my students is degree seeking, so we chose core classes that coincided with the specific requirements of their degree. My other student is not yet sure of what they wish to pursue, so we chose classes from the core list that we felt would be beneficial. The other factor in choosing classes for our undecided student was which classes might light a spark that would inspire or motivate them. This is the finished High School Plan for that student.
Semester Plan
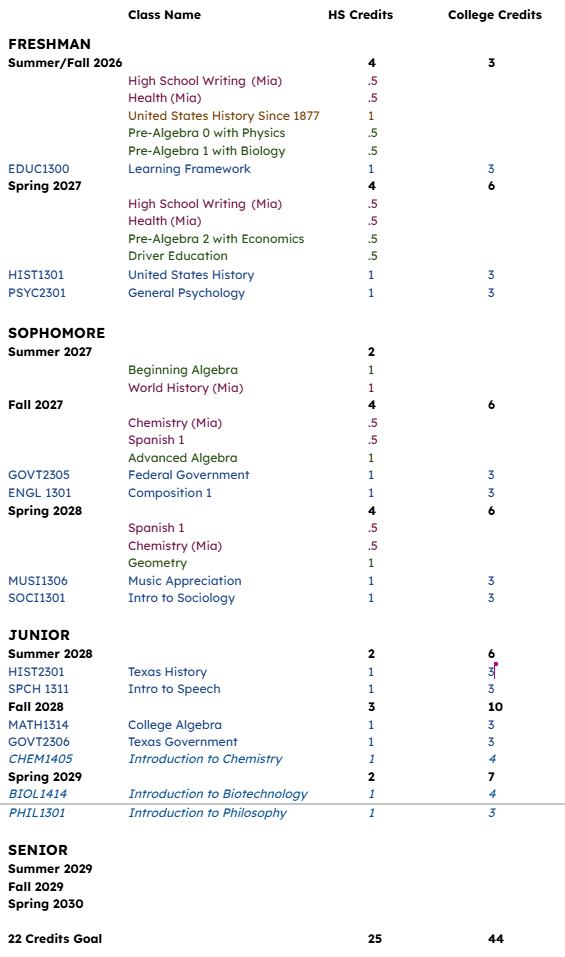
After figuring out which classes they would be taking, it was time to figure out the “when” part. We decided to break it down to Summer, Fall and Spring and encourage our students to take winter breaks. The time will come when they need to request time off. I want them to enjoy some time off while they can. I began laying out the classes one semester at a time. By senior year, both of my students had almost no classes left on their lists. This is not a problem. My plan is to attempt the plan as it is. If it works, they will be able to work or continue their education with more classes in the latter part of High School. If it doesn’t work, we make adjustments and spread the courses out as needed. This is the joy of the flexibility of Homeschooling.
High School Graduation Plan Form
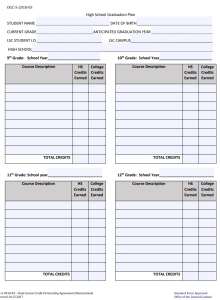
Once you have completed a plan for your student, it is time to enter it into the Graduation Plan that the college requires.
Note that this isn’t a semester-by-semester layout. It is a year-by-year layout. The high school plans that I showed above were formatted by semester. When you complete this form, each section is an entire year, so be sure you enter all of the classes from all semesters in the proper year section. When signing the form, the Parent is also the Principal.
Step 5: Homeschool Transcript
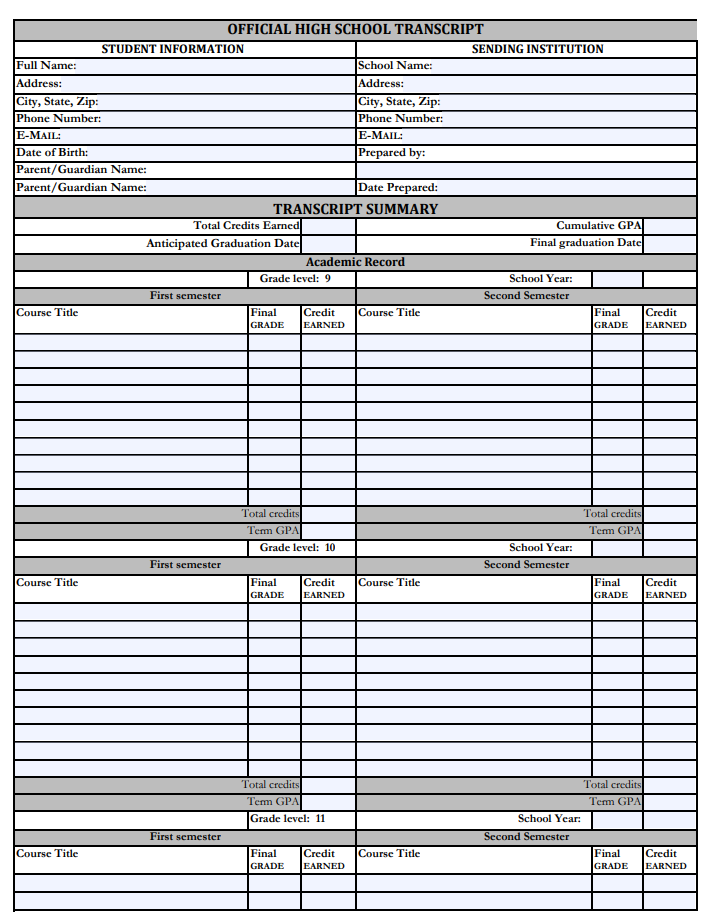
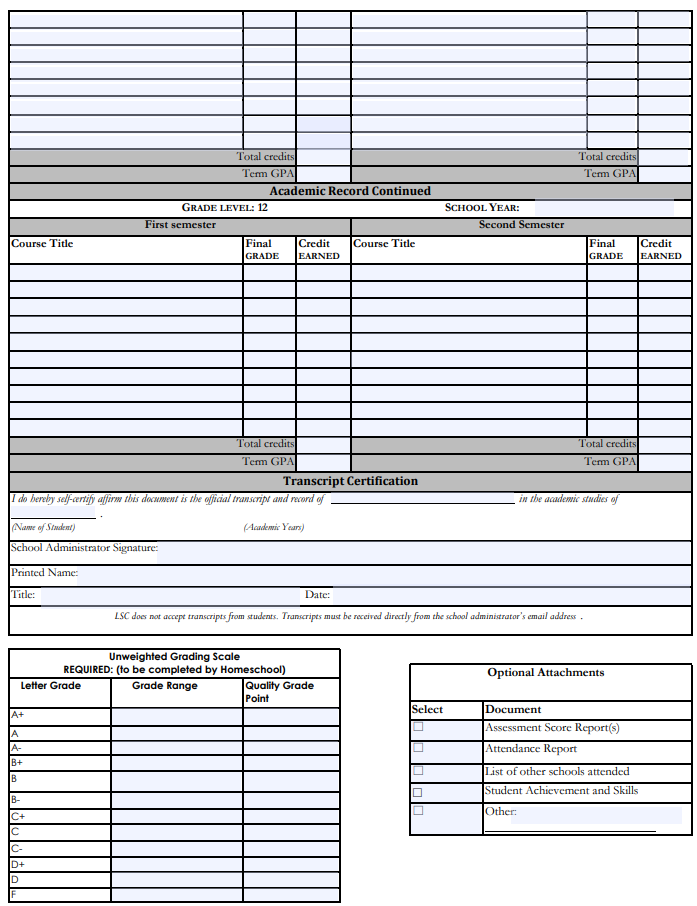
The High School Transcripts form was very easy for our family. Because we had not begun High School yet, the only parts of the form that we needed to fill out were the Student Information, the Sending Institution and the Transcript Certification. For this form, the School Administrator is the parent. For the school name, you can type in “Your Last Name” Home School.
If you are in the middle of your high school journey, the planning that you did for Step 3 should help you to fill out the transcript from what you already know your student has completed and fill in the grades and credits.
Step 6: Course Approval AND Parental Consent
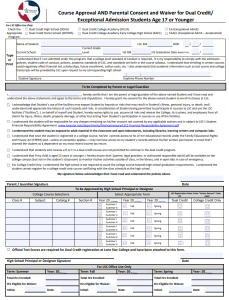
This form is to agree to the terms of Dual Credit with Lone Star and to register for specific classes. You need to complete this form separately for each semester. Where you fill out college course selections, you will need to know the Class Number, Subject, Catalog # and Section # for each. To find this, you and your student can View Classes.
Let’s say your student wanted to take PHED1164. You would type PHED 1164 into the search section. Once you find a class that fits your student’s schedule, you would also get the Class and Section numbers from the listing. You can not register online for Dual Credit classes. They must be requested through the form and then approved by the dual credit advisors.
Exceptional Admissions Course Approval Form

Step 7: Upload Documents
Per Step 1, you should have reached out to an advisor at your local campus. The Homeschool Dual Credit Registration Request varies by campus location. For Montgomery, Conroe Center or Creekside, this is the link. Their form is thorough and clear.
For the form I had to fill out, each type of document (Graduation Plan, Transcript, etc.) had to be a separate file and named [Student First Name] [Student Last Name] [Student ID #] [File Type].
After panicking about our printer/scanner not functioning properly for me to upload these documents, I learned a new trick! If you have an android phone, go to the Google Drive app and tap the plus button for a new file. You can select scan and photograph to scan your files into pdf. The best part is that you can scan several pages per file! Make sure you name them appropriately to save time later!
After Registration
The above steps walk you through registering your student for dual credit. Once they have a student ID, they can log into their Student Portal and see any holds on their account. Completing submission of vaccine records showing Meningitis vaccine was required for my students. Additionally, they had to attend online or in person orientation (this is different from the dual credit session.) I would also suggest that your student take the Pre-TSIA practice tests before going in for placement testing if required.
I hope that this helps you and your student understand the process of registering as a dual credit student. Lone Star College is a wonderful college. I have taken several classes there, myself. I’m thrilled to have such a fantastic institution available to my children.
After Registration
In the event that your student needs to drop a course, the form can be found here.


You May Also Like
Camping for Life

Where to Find Fun Patch Programs