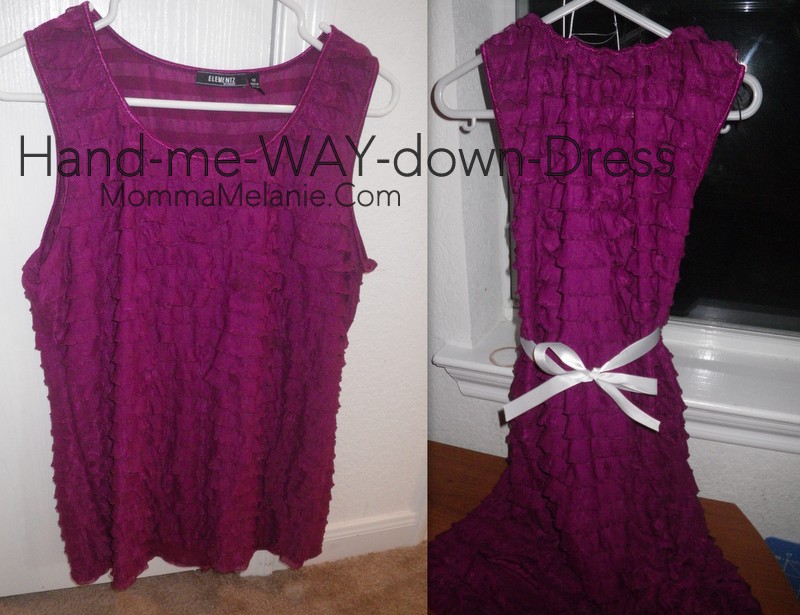
The Hand-me-WAY-down Dress
When this shirt didn’t fit, I wasn’t surprised, or upset. BUT… I KNEW that fabric would be great for something! There had to be something that I could use it for, right?
When I happened upon this 20 minute ruffle dress tutorial today on Baby Making Machine, I knew that I could turn it into a dress… and probably without much work. It wouldn’t look like hers did… but it could turn out super cute! So… I got to work. (I didn’t use the tutorial, but if you check out the link, you’ll see why it inspired me…)
The first thing that I did was use a ballpoint needle with a big hole to thread some round elastic through the neckline hem. (Is it called a hem if it is in the neckline? I don’t know…) It was a little tricky, as there wasn’t much space in there…

I started at one shoulder seam and threaded it through the whole way around. I left an elaborate amount out so that I could adjust as I desired when I was finished.
Then I tried to plan out where I thought the new side seams should be, and where I thought I wanted the arm-holes to end. I used baby pins to hold it in place because standard pins would have been more likely to snag it when I tested it right side out.

I flipped the shirt/dress to the right side and decided that I liked the arm holes and the lines. Hooray!
Wrong side out, I started hand-stitching the arm hole closed from where I pinned it, for about an inch. When I flipped it right-side-out, it looked pretty good!
Honestly, like I usually do on any projects, I eyeballed the seam on the first side. I used a straight stitch and tried to make sure that the fabric was all headed the right direction as I sewed.
NOTE: ONE spot had the frilly stuff flipped up instead of down and it will probably annoy me forever. SO… if you work with this fabric, I suggest that you tape it down once you have it pinned, to avoid problems.
Anyway, I stitched it straight and then some sort of x’s and straight lines stitch (Pardon my lack of sewing term knowledge.) to go over it.
I kept the fabric care tag and stitched it right into that new seam. I figured that the fabric and care would be the same. I removed the manufacturers labels from the neckline.
Then, I did the other side, as evenly as I can. It’s how I roll…
And trimmed the excess off very carefully…
My little model was very happy about what she called her “new pajamas.” Pardon the blurry photo… I thought the grin was worth including.

The dress is obviously too big for her at this stage. BUT… I think it turned out pretty cute! It definitely needs a belt of some sort. I cut ribbon to keep on the hanger and I think it looks nice. I may put more elastic at the waist line, but I think I’ll play it by ear as she grows.
Realistically, a toddler in this fabric is a dangerous mix anyway, so the bigger she is when she wears it, the better. But by golly, I made that shirt into a dress! Enjoy!


You May Also Like

How Our Pet Journey Began
Traveling Together